Update 2017-05-22: This post originally written for a project.json .NET Core project. It has been edited for a .csproj .NET Core project.
Visual Studio Code (aka VSCode) is a lightweight text editor from Microsoft. Many people think just because it is a “text-editor”, they will be missing the features they are used to from an IDE like Visual Studio. With the proper configuration, VSCode can be a very powerful tool.
Setup
VSCode by default doesn’t come with the tools necessary to build .NET Core projects. The following setup will be necessary to get the editor, compiler, and extension necessary to get you closer to an IDE experience.
- VSCode Installation
- This is the vanilla text-editor. Installation of extensions and other software may be required for your language to get an IDE-like experience.
- .NET Core SDK Installation
- Provides .NET runtime, framework, compiler, and other tooling
- Bleeding edge builds can be found on the project’s GitHub
- C# VSCode Extension
To install an extension, open the Command Palette (cmd+shift+p), remove the >, and run ext install csharp.
Note: While this tutorial is cross-platform , all given commands are using Mac OS X key bindings. For Windows and Linux, replace cmd with ctrl.
Key Bindings
Command Palette
The most important key binding in VSCode is cmd+shift+p, which brings up the Command Palette, similar to Sublime Text. Why is it so important? Hitting those keys brings up a search box that allows you to start typing a command like “ext” for “Extensions: Install Extensions” or “build” for “Tasks: Run Build Task”.
Shell
You will frequently need to run shell commands within VSCode. ctrl+` toggles an in-editor shell.
ReSharper Bindings
Where would each of us be without alt+enter, ReSharper’s quick fix and context actions key binding? Just because you don’t have ReSharper doesn’t mean your life is over (even though some people might think that). Common ReSharper operations are supported in VSCode, and these operations can be bound to custom key bindings, which allows us to roughly mirror the ReSharper plugin in VSCode. The below are the most common ReSharper key bindings I use. You can use the Command Palette to search for “Preferences: Open Keyboard Shortcuts”.
[
	{ "key": "alt+enter",                 "command": "editor.action.quickFix",
                                     "when": "editorTextFocus" },
	{ "key": "cmd+b",               "command": "editor.action.goToDeclaration",
                                     "when": "editorTextFocus" },
	{ "key": "alt+f7",               "command": "editor.action.referenceSearch.trigger",
                                     "when": "editorTextFocus" },
	{ "key": "cmd+shift+alt+n",                 "command": "workbench.action.showAllSymbols" },
	{ "key": "cmd+n",                 "command": "workbench.action.quickOpen" },
	{ "key": "cmd+shift+n",                 "command": "workbench.action.quickOpen" },
	{ "key": "cmd+f12",			"command": "workbench.action.gotoSymbol"},
	{ "key": "cmd+t l", 			"command": "workbench.action.tasks.test"},

	{ "key": "cmd+p",			"command": "editor.action.triggerParameterHints"}
]
| Command | ReSharper | VSCode default |
|---|---|---|
| Quick Fix | alt+enter | cmd+. |
| Go to anything | cmd+n | cmd+p |
| Go to symbol | cmd+shift+alt+n | cmd+t |
| Go to declaration | cmd+b | f12 |
| Go to file | cmd+n | cmd+p |
| Go to file member | cmd+f12 | shift+cmd+o |
| Parameter info | cmd+p | shift+cmd+space |
| Find usages | alt+f7 | shift+f12 |
| Run all tests | cmd+t l | N/A |
VSCode key bindings reference: https://code.visualstudio.com/docs/customization/keybindings
ReSharper key bindings reference: https://www.jetbrains.com/resharper/docs/ReSharper_DefaultKeymap_IDEAscheme.pdf
Building and Debugging .NET Core Applications
This is it. The moment you’ve been waiting for. Using VSCode as an IDE.
Creating a .NET Core Project
VSCode doesn’t have a UI to create new projects, since it is file and folder based. However, we can use the in-editor shell to create a project after creating a folder.
mkdir my_project
code my_project
Note that the above requires code to be in your path. You can do this via searching “PATH” in the Command Palette.
Once we are in VSCode, run the following in the in-editor shell to create a new .NET Core command line project
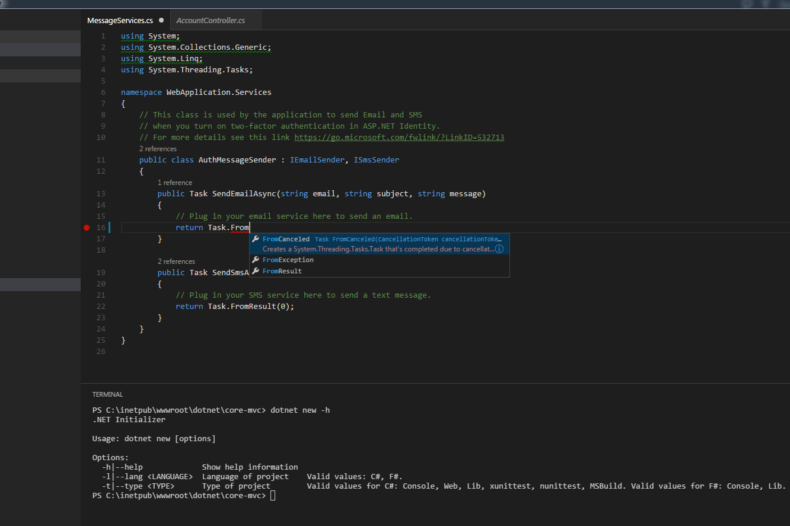
dotnet new
# Run `dotnet new -h` to see your available options.
# Some templates that are available: Console (the default), Web (ASP.NET Core MVC), Lib (class library), xunittest and nunittest (XUnit and NUnit test projects)
You might see: “Required assets to build and debug are missing from your project. Add them?” Select “Yes”.
Building and Debugging
The building and debugging key bindings are the typical bindings from Visual Studio.
To debug, set a breakpoint and hit F5. It’s really that easy!
NuGet
Now that we are able to debug a .NET Core application, let’s walk through the common task of adding a NuGet dependency.
VSCode doesn’t come with a NuGet client by default, so let’s install one via ext install vscode-nuget-package-manager.
To install a NuGet package:
- Open the Command Palette and search for “NuGet Package Manager: Add Package” and hit enter
- Enter a search term and hit enter (e.g. “json”)
- Select a package from the list and hit enter (e.g. “Newtonsoft.Json”)
- Select a version from the list and hit enter (e.g. 9.0.1)
- Select a project to add the reference to
- Run
dotnet restorein the in-editor shell as prompted by the NuGet extension
Alternatively, you can use the dotnet NuGet commands directly:
dotnet add path/to/your_project package Example.Package -v 1.0
Be aware that not all NuGet packages are compatible with .NET Core. See this awesome list of packages that support .NET Core. Hint: your favorite packages are probably there.
Testing
“The code is not done until the tests run” – A person
Now that we have a .NET Core project with a NuGet package reference, let’s add a test.
Set up
We need to install the following NuGet packages:
- NUnit
- NUnit3TestAdapter, at least version 3.8.0-alpha1
The following will have to be added to .vscode/tasks.json:
{
	"taskName": "test",
	"args": [],
	"isTestCommand": true,
	"problemMatcher": "$msCompile"
}
Note: You may be able to run dotnet new -t xunittest or dotnet new -t nunittest depending on what version of dotnet you have installed. The bleeding edge can be installed from the GitHub page.
Running the Test
Now we can add the simplest failing test:
using NUnit.Framework;

[TestFixture]
public class ProgramTests
{
	[Test]
	public void Should_fail()
	{
		Assert.Fail("This is a failure!");
	}
}
Now when we hit cmd+t l, our test will fail!
Debugging the Test
If you prefer to use xUnit (see: dotnet-test-xunit) you can easily run or debug the test by simply selecting the corresponding option in the editor. Unfortunately, debugging with NUnit isn’t quite as simple yet, and currently requires a convoluted process. See this GitHub issue that addresses this.
Conclusion
VSCode out-of-the-box won’t give you everything you need to be fully productive with .NET Core, but with some setup you should be up and running in no time. Do you have any VSCode tips and tricks of your own that I didn’t mention? Please comment below and share.
Summary of Setup
- VSCode Installation
- .NET Core SDK Installation
- ext install csharp
- ext install vscode-nuget-package-manager
[amp-cta id=’8486′]